The deviation message service, known in by its Norwegian name “Avvik” is quick user interface tool where a user can create SIRI SX messages and apply them to their own routes or stops. It is a generic online tool.
Access to this tool must be explicitly granted by Entur administrators. Access is given per data provider - not line by line.
| Note |
|---|
The service creates SIRI SX data and feeds it directly into the Entur journey planner. It is important that it does not duplicate already existing SX data from other sources. |
Getting started
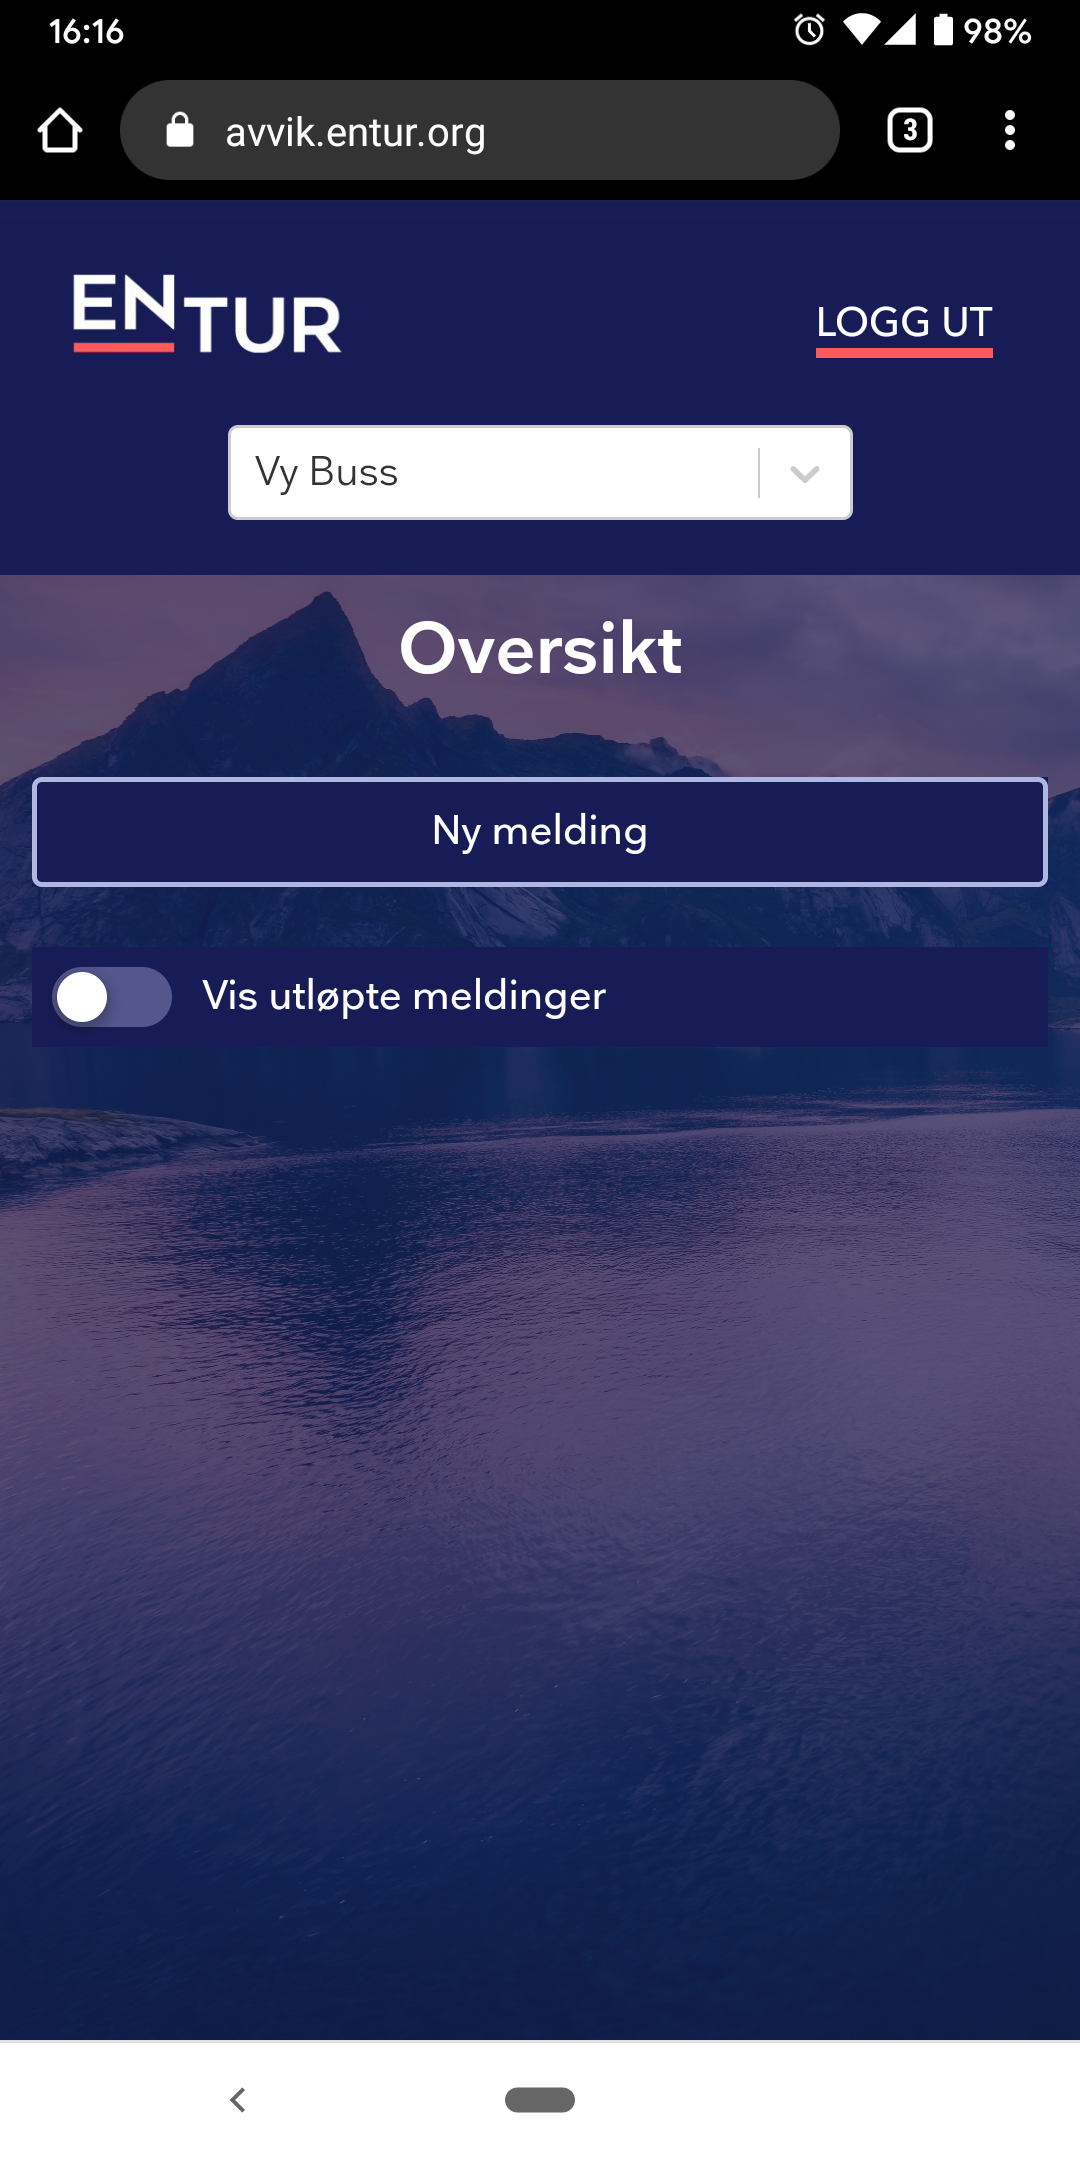
The service is accessed via a web - browser and also works from mobile devices. It uses the same login as our other services - such as the stop places registry.
If you have a user account in the production environment with this service, go to https://avvik.entur.org/ and log in. Staging: https://avvik.staging.entur.org/, Devdev: https://avvik.dev.entur.org/
Once logged in, if you have been given access, a drop-down menu at the top of the page should show the name of your company. In some cases, you may have several options to choose from here since the menu shows companies from the authority field of any dataset (codespace).
Here you will see an overview of all currently active messages, as well as a checkbox to show expired messages.
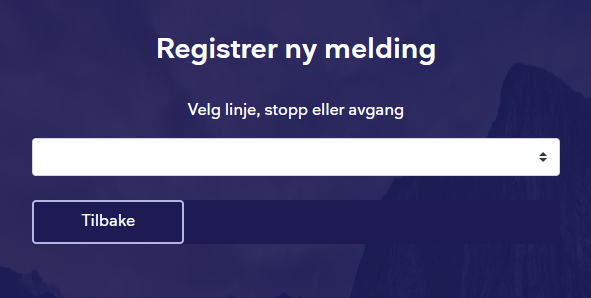
To add new messages, click the “Ny melding” button.
From the dropdown, select one of the three options:
Line (Linje)
Stop place (Stoppested)
Departure (Avgang)
Deviations on line
Adding deviations to line creates a message which will appear on any travel search which includes this line. It is regulated by a to and from date. This category should be used when there is a disturbance on the operation of the line itself.
Step by step
After selecting the Line (Linje) option, in the second drop-down menu select which line to add the message to.
If the message is only relevant to certain stops - mark the checkbox (also read about Limited to specific stops below).
Select the validity period of your message. It may be valid back in time, or in the future. The end date field is optional but recommended.
Message type has two options. Incident and General. Read more about the difference in the section below.
There are three message fields.
The top field should be a short header to get peoples attention. 3-5 words should be enough here.
The second field should describe the situation more in-depth and can be much longer.
The third field (
 might not be shown by all journey planners at this time) can give an in-depth description of how the traveller should- or should not act related to the situation.
One all fields are filled out - click “Registrer” (or to discard all information, click “Tilbake”). The message can, of course, be deactivated and edited later on.
Limited to specific stops
By checking the “Gjelder avviket for spesifikke stopp?” checkbox you can limit the message to specific stops on that specific line. This means the travel search must include both the line and the stop, or stops.
| Info |
|---|
Messages can not be added to multiple stops. This may actually be a bug and we will see if multiple stops can be allowed at a later time. |
Step by step
Follow the steps above. On item two, type the name of the stop in question, or scroll down the menu, and select the stop you wish to add the message to.
Deviations on stop places
Adding deviations to a single stop creates a message which will appear on any travel search which includes this stop. This means it will also appear on journeys operated by other companies. This category should only be used if there is a disturbance which is relevant to any traveller on this stop - regardless of which public transport company the traveller will travel with.
If the disturbance on the stop only relates to specific lines - use deviations on line limited to specific stops (see above).
| Info |
|---|
Messages can be added to multiple stops. |
Step by step
After selecting the Stop place (Stopp) option select which stop place, or places, to add the message to.
This can be done by scrolling down the list or typing out the name.
Once a stop has been selected, you may repeat the same procedure to add more stops.
Use the “x” icon behind each added stop to remove them.
Select the validity period of your message. It may be valid back in time, or in the future. The end date field is optional but recommended.
Message type has two options. Incident and General. Read more about the difference in the section below.
There are three message fields.
The top field should be a short header to get peoples attention. 3-5 words should be enough here.
The second field should describe the situation more in-depth and can be much longer.
The third field (
might not be shown by all journey planners at this time) can give an in-depth description of how the traveller should- or should not act related to the situation.
One all fields are filled out - click “Registrer” (or to discard all information, click “Tilbake”). The message can, of course, be deactivated and edited later on.
Deviation on departures
Adding deviations to a departure creates a message which will only appear if a travel search includes that specific departure. That is - a specific departure at a specific time on a specific date.
Step by step
After selecting the Departure (Avgang) option select which line to add the message to.
Select the date of the departure and click “Søk avganger” (search for departures).
In the drop-down menu “Velg avgang”, select the departure.
If the message is only relevant to certain stops - mark the checkbox (also read about Limited to specific stops above. This option is currently unavailable
Message type has two options. Incident and General. Read more about the difference in the section below.
There are three message fields.
The top field should be a short header to get peoples attention. 3-5 words should be enough here.
The second field should describe the situation more in-depth and can be much longer.
The third field (
might not be shown by all journey planners at this time) can give an in-depth description of how the traveller should- or should not act related to the situation.
One all fields are filled out - click “Registrer” (or to discard all information, click “Tilbake”). The message can, of course, be deactivated and edited later on.
Incident or General message
The basic idea for a deviation message is to inform about a situation which causes changes to the traffic in the coming 24 hours. Long term changes should be reported in planned data in the NeTEx format.
It is, however, possible to add long term messages for various reasons and here the choice between Incident and General comes into play.
An incident is something that has happened which will force travellers to either take special care - or to alter their plans altogether. These are typically only valid for the duration of the incident.
Examples
There is an ongoing fire or a landslide has destroyed the road
There has been a traffic accident which blocks the road
A vehicle has broken down
Technical issues force passengers to buy tickets in an unusual manner
A general message is something which adds information about the journey and can prove helpful to the traveller underway. These messages can be valid for a longer period of time, however, permanent or long term information should be added as
noticeinformation through NeTEx planned data.Examples
The sequence of stops have been altered and travellers must take extra care.
There is a risk of delays due to current events unfolding, such as sporting events.
Luggage should be kept to a minimum due to passenger congestion.
How to board or behave on a journey during the COVID-19 pandemic.
General guidelines
| Info |
|---|
What language should I write my messages in? At this time Entur only supports messages in a single language. Messages should therefore primarily be written in Norwegian, however, for tourist-oriented routes or areas the message can be written in English, or both. |
| Info |
|---|
How should I formulate my messages? Remember that your message will be shown in a multitude of services. Therefore avoid using terms like “we will take this action” since it may be understood as the service displaying the message will perform the action instead of you. Make sure your message is short and to the point, and give the most critical information first. Leave formalities to the end. Use appropriate and correct language. Capitalization and punctuation as per usual. Avoid shortening words and usage of acronyms. |
| Note |
|---|
Messages on stops Be aware that messages on stops will be visible on all trips passing that stop, including those by other operators. Such messages may be confusing to the public since they may be out of context. |
| Info |
|---|
Manage the validity of your messages Do not publish messages with impossibly long validity. Keep time spans sharp and strict and make sure messages which are no longer meaningful are either deactivated or expire on validity date. |